
[spb_text_block pb_margin_bottom=”no” pb_border_bottom=”no” width=”1/1″ el_position=”first last”]
Editor’s Note: We are happy to introduce a new author Cornelius. Check out more of his work and the original post at www.ProjectileObjects.com.
Tutorial: Basic Projection Mapping for Outdoor Advertising.
Quick video sample.
[/spb_text_block] [spb_video link=”http://youtu.be/adaXojBGSmc” full_width=”no” width=”1/1″ el_position=”first last”] [spb_text_block pb_margin_bottom=”no” pb_border_bottom=”no” width=”1/1″ el_position=”first last”]
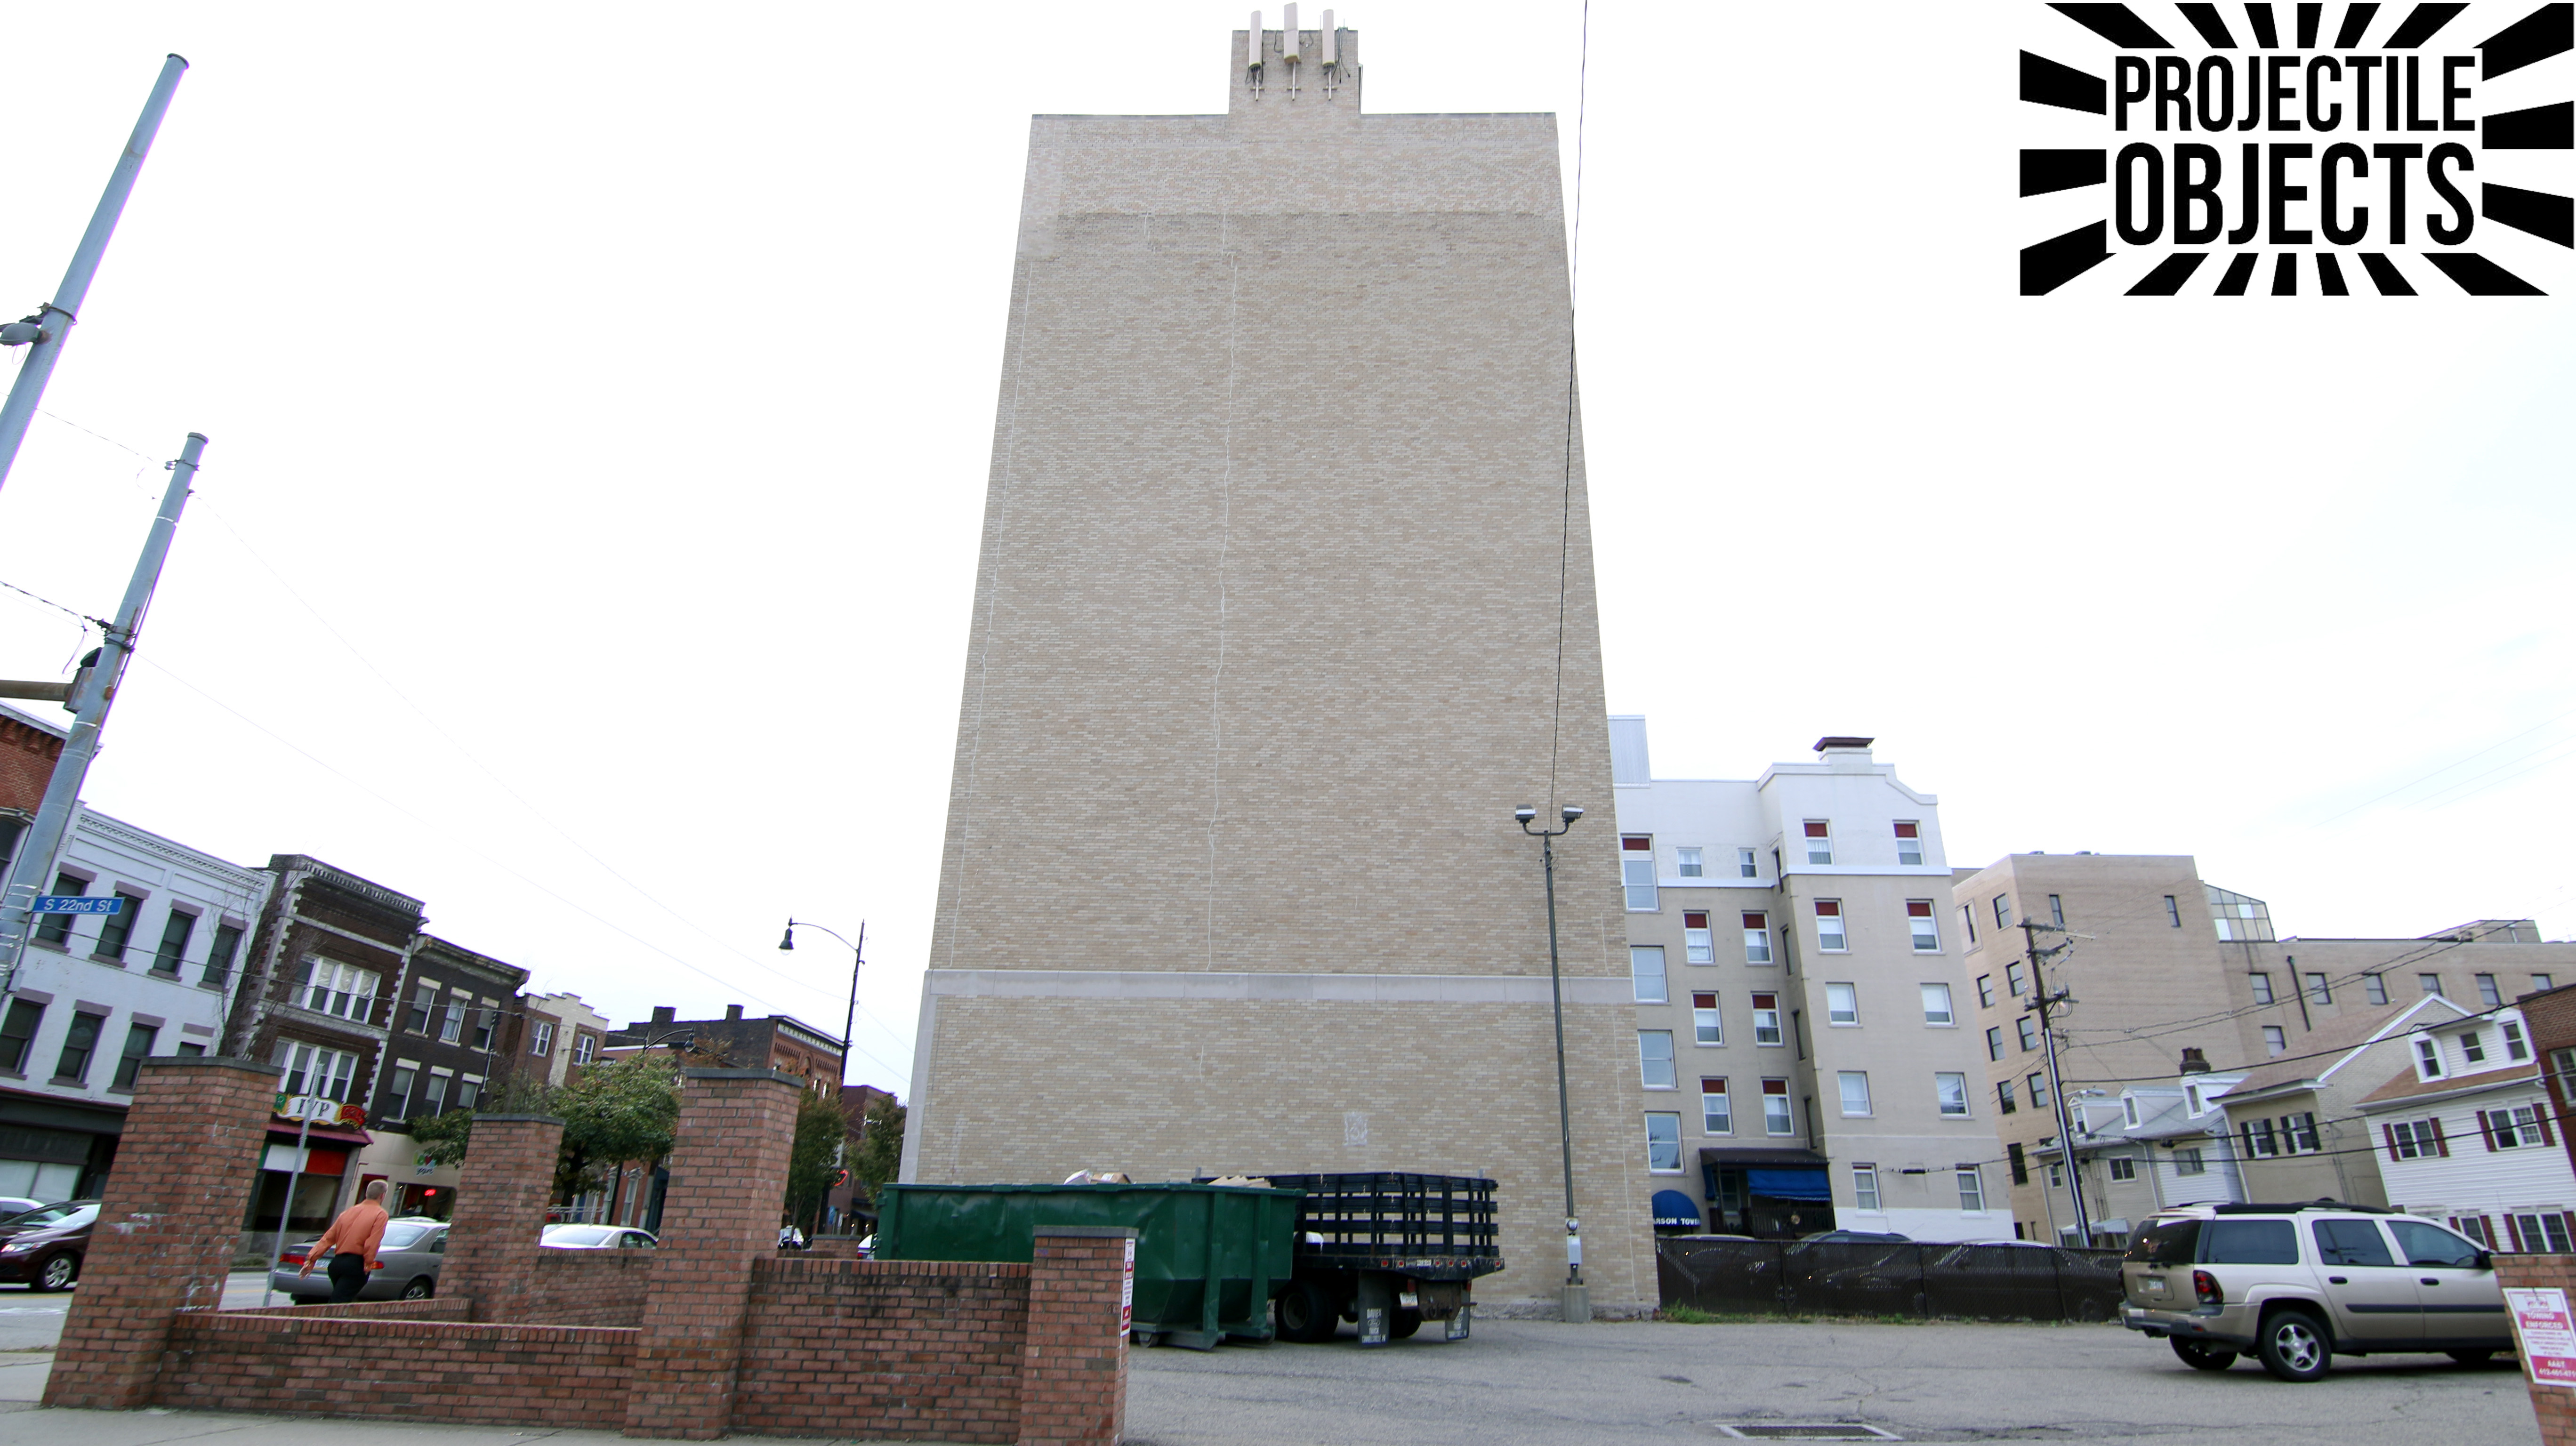
Task #1: Scout your location during the day and take a picture.
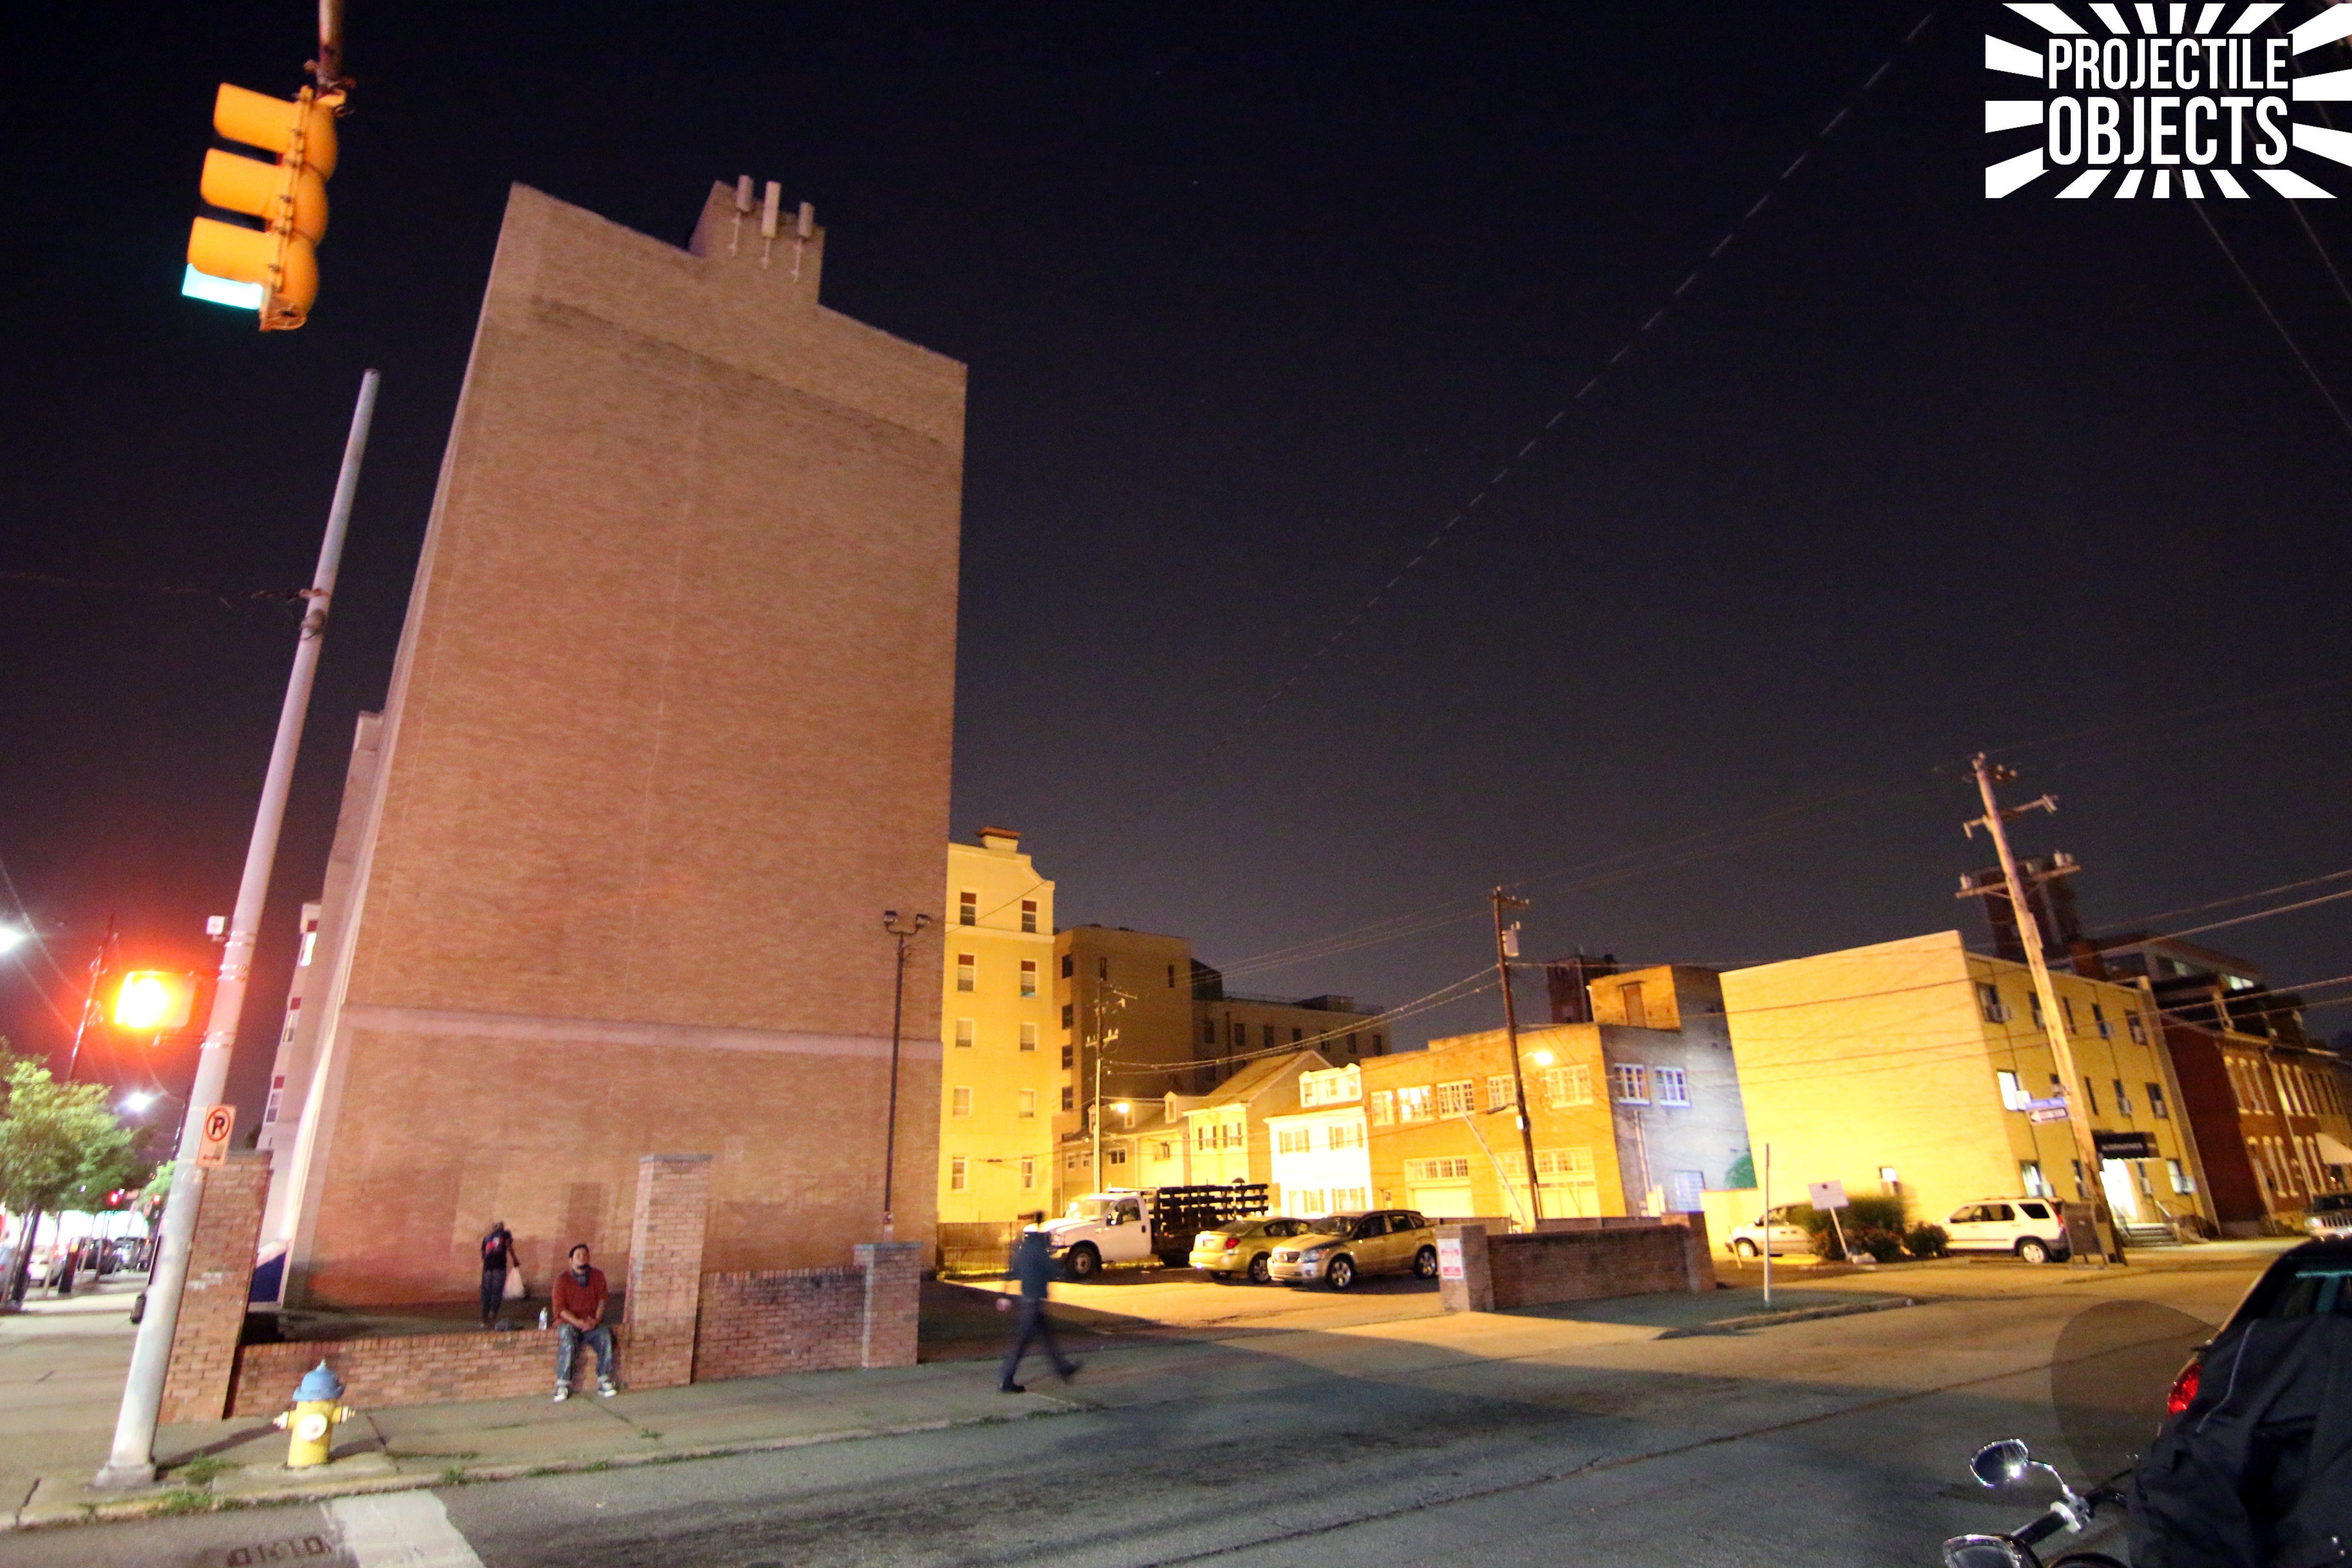
Task #2: Scout your location at night and take a picture. 🙂

This step is extremely important as you will need to look for sources of light that may ruin your image.
Also it is important to note parking, building specs, potential hazards, height requirements (can’t shoot 10,000 lumens into oncoming traffic), and so on. Use common sense as your ally.

Since this was a new location we wanted to test it out before we brought in all of the equipment, so we went out with my portable projector pack and used a 3500 Lumen view sonic PJD6531w to see how it would go. Luckily there didn’t seem to be any problems with that location.
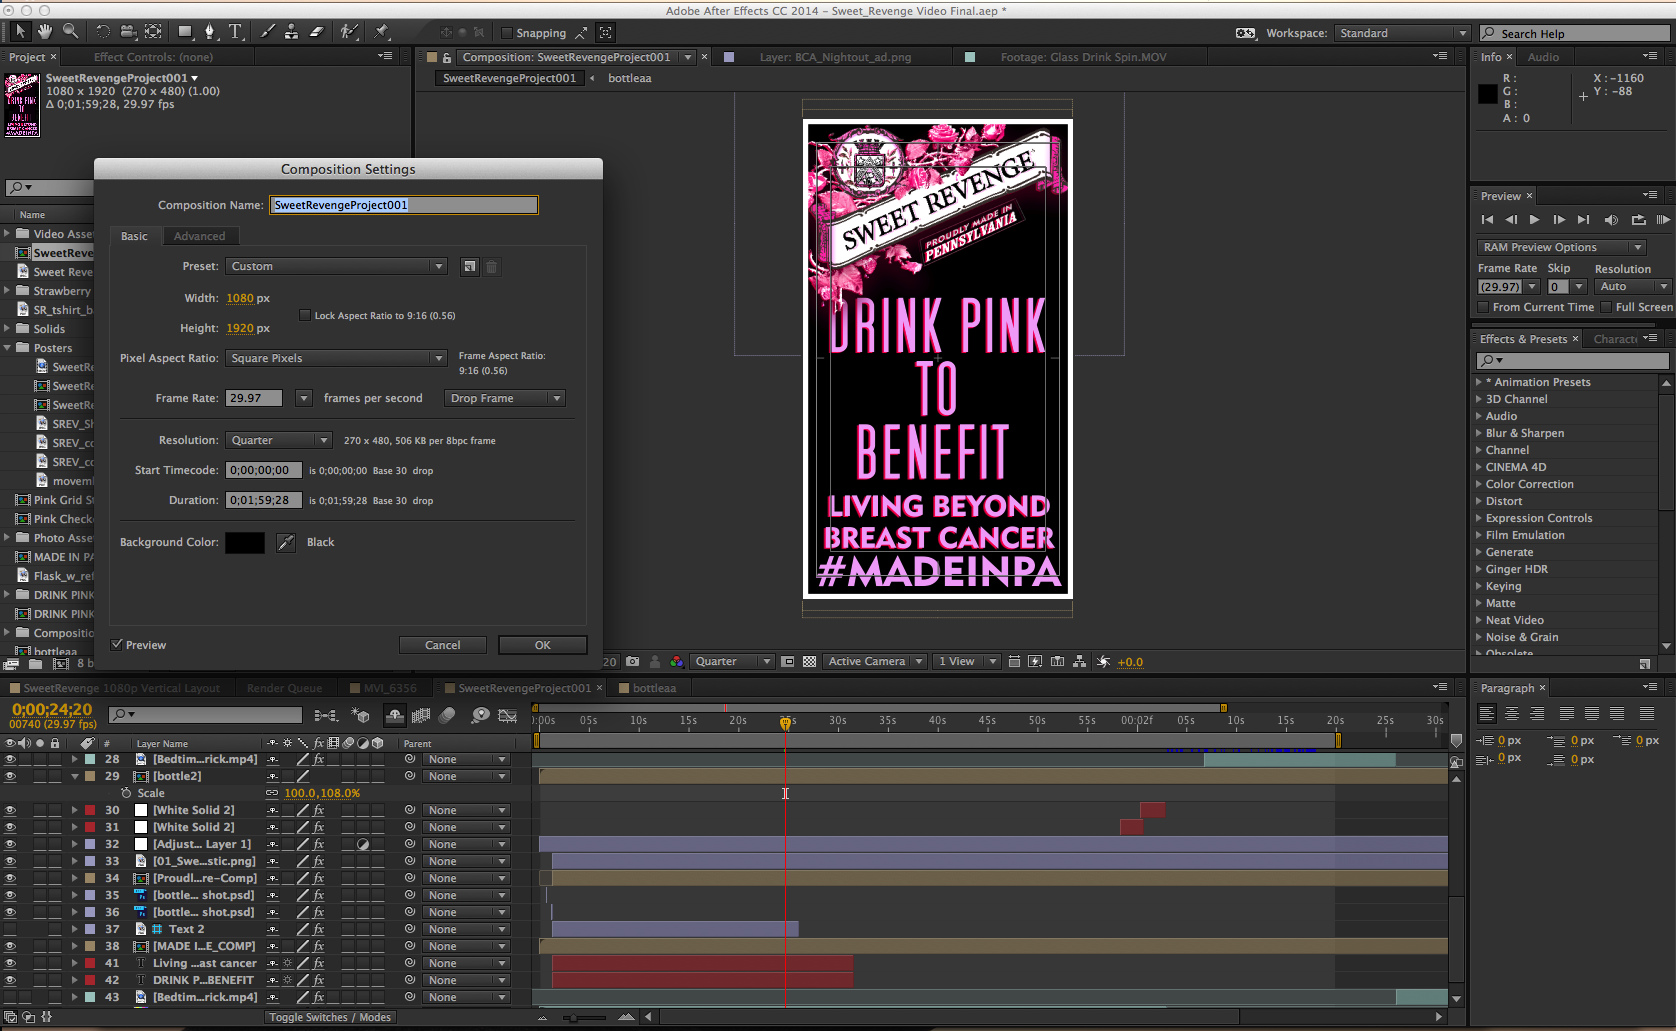
Task #3: Create a mockup and content.
For this I created a mockup from the initial photos taken during night scouting. Once it was approved I moved forwards in creating the visual content loop. We went through a total of 3 revisions before our final.

Task #4: Equipment rental.
I don’t want to get into the specifics of projectors in this example, but I will be releasing more information on that side of the game very soon. For this project we used an older version of the 8500 lumen Pansonic PT-DZ870U (http://www.bhphotovideo.com/c/product/992728-REG/panasonic_pt_dz870uk_1_chip_8_500_lumens_dlp.html) and brought two lenses with us. .8 (wide) and a standard zoom (1.5?).
Task #5 The Setup.
With the help of Hearcorp’s Adam and Issac we used a box truck to give us enough ground clearance to keep the projector away from pedestrians. A silent Honda eu2000i generator provided plenty of power to run the projector and my laptop for the 5 hour promotion.
[gss ids=”1585,1591,1590,1589,1588,1587,1586″ name=”thesetup” style=”width:100%” carousel=”fx=carousel”]
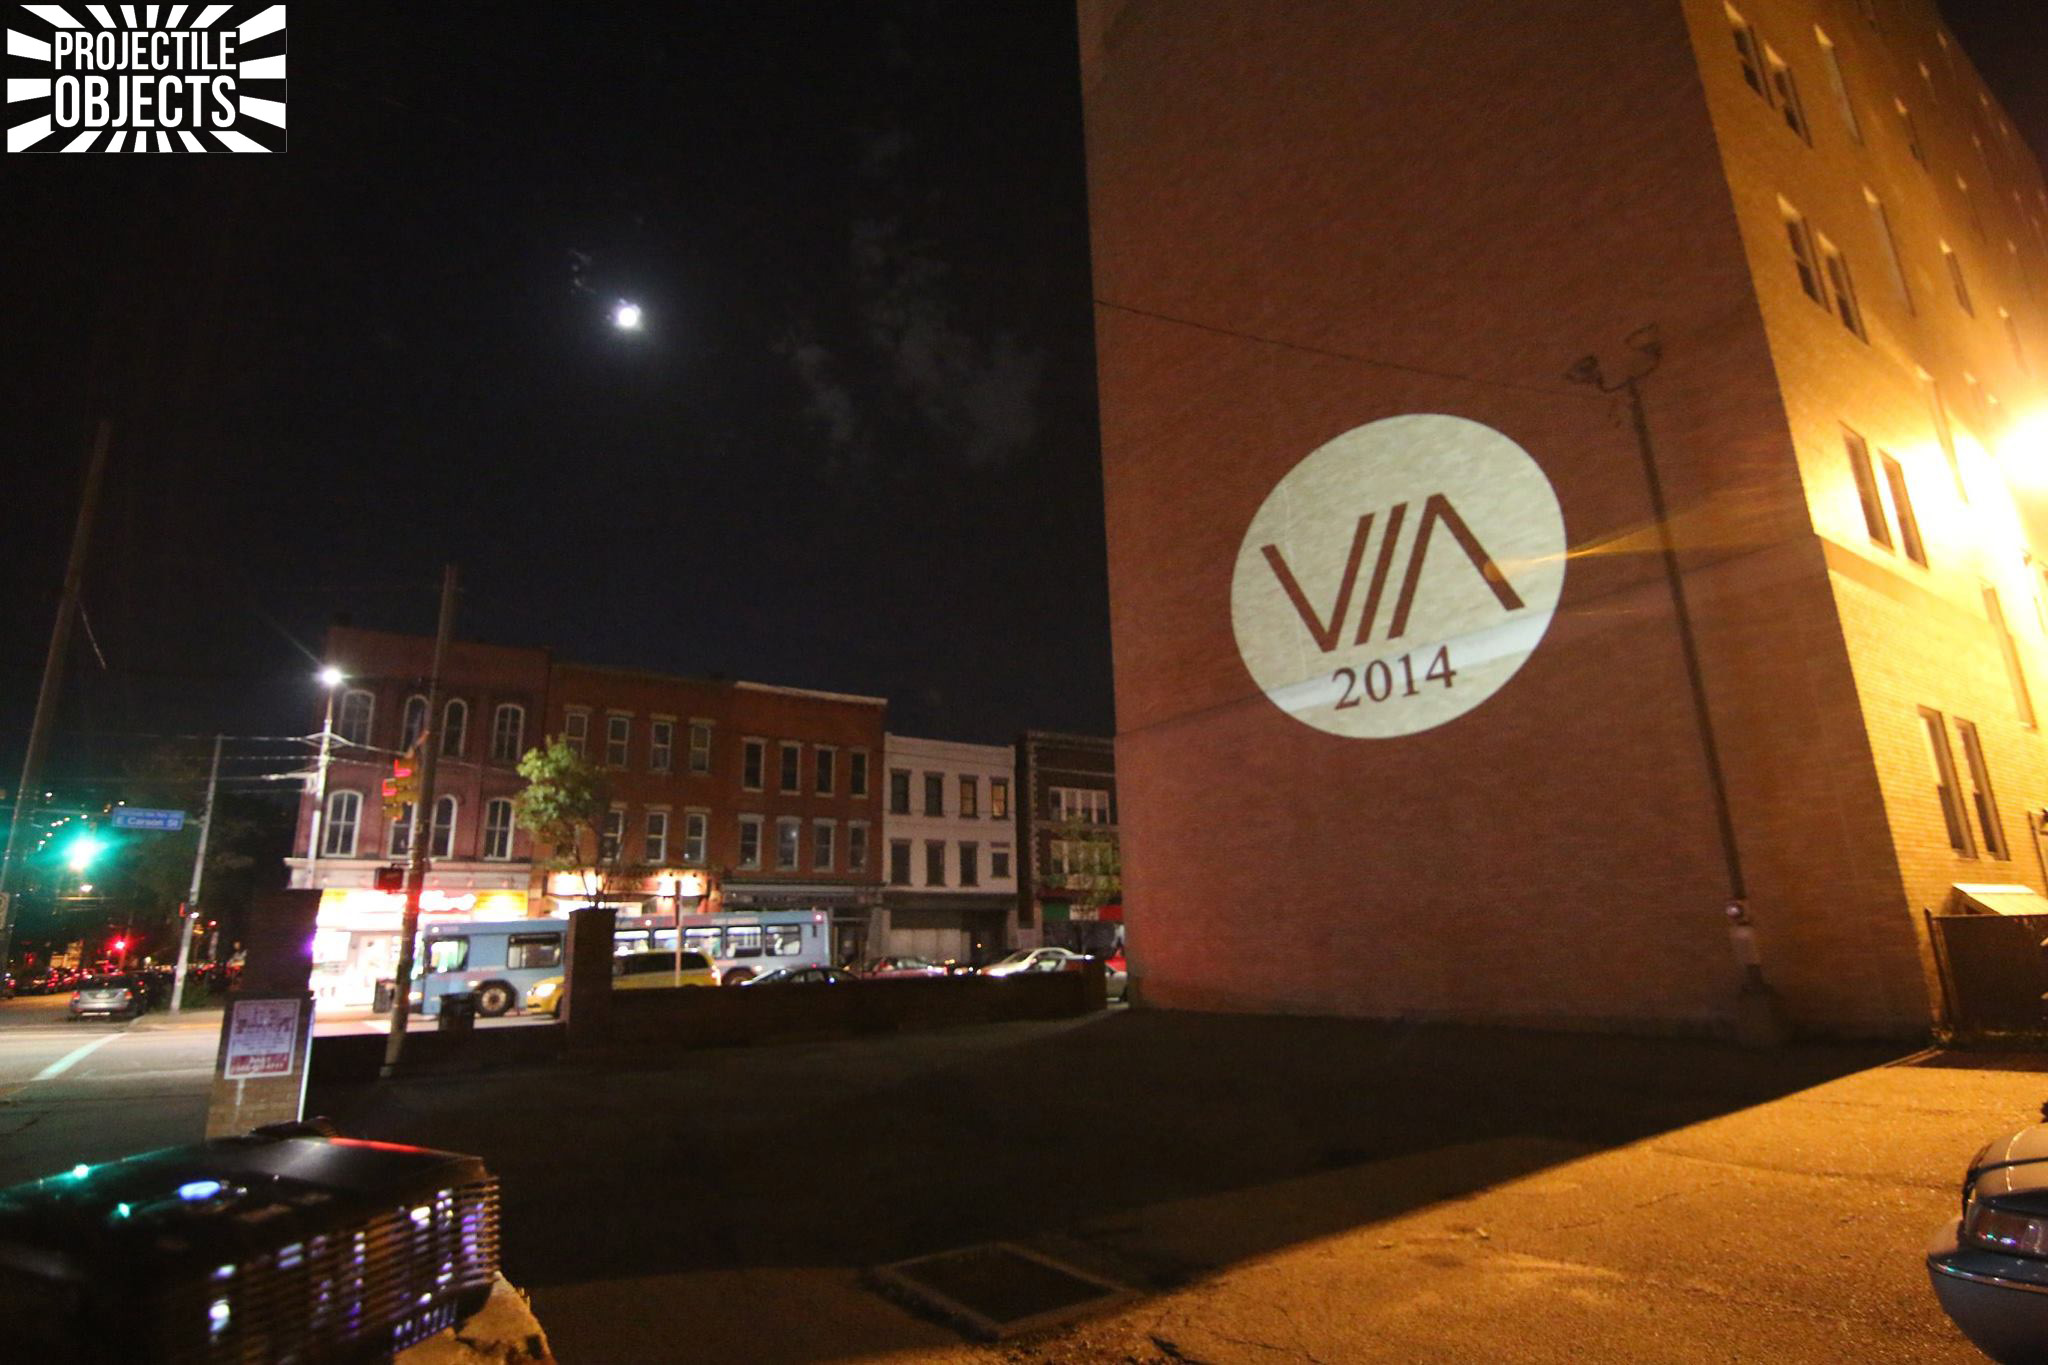
And so, simply setup the projector and point it at the wall. Wait for dark and….
FAIL
Task #6 Expect failure and meet the challenge.
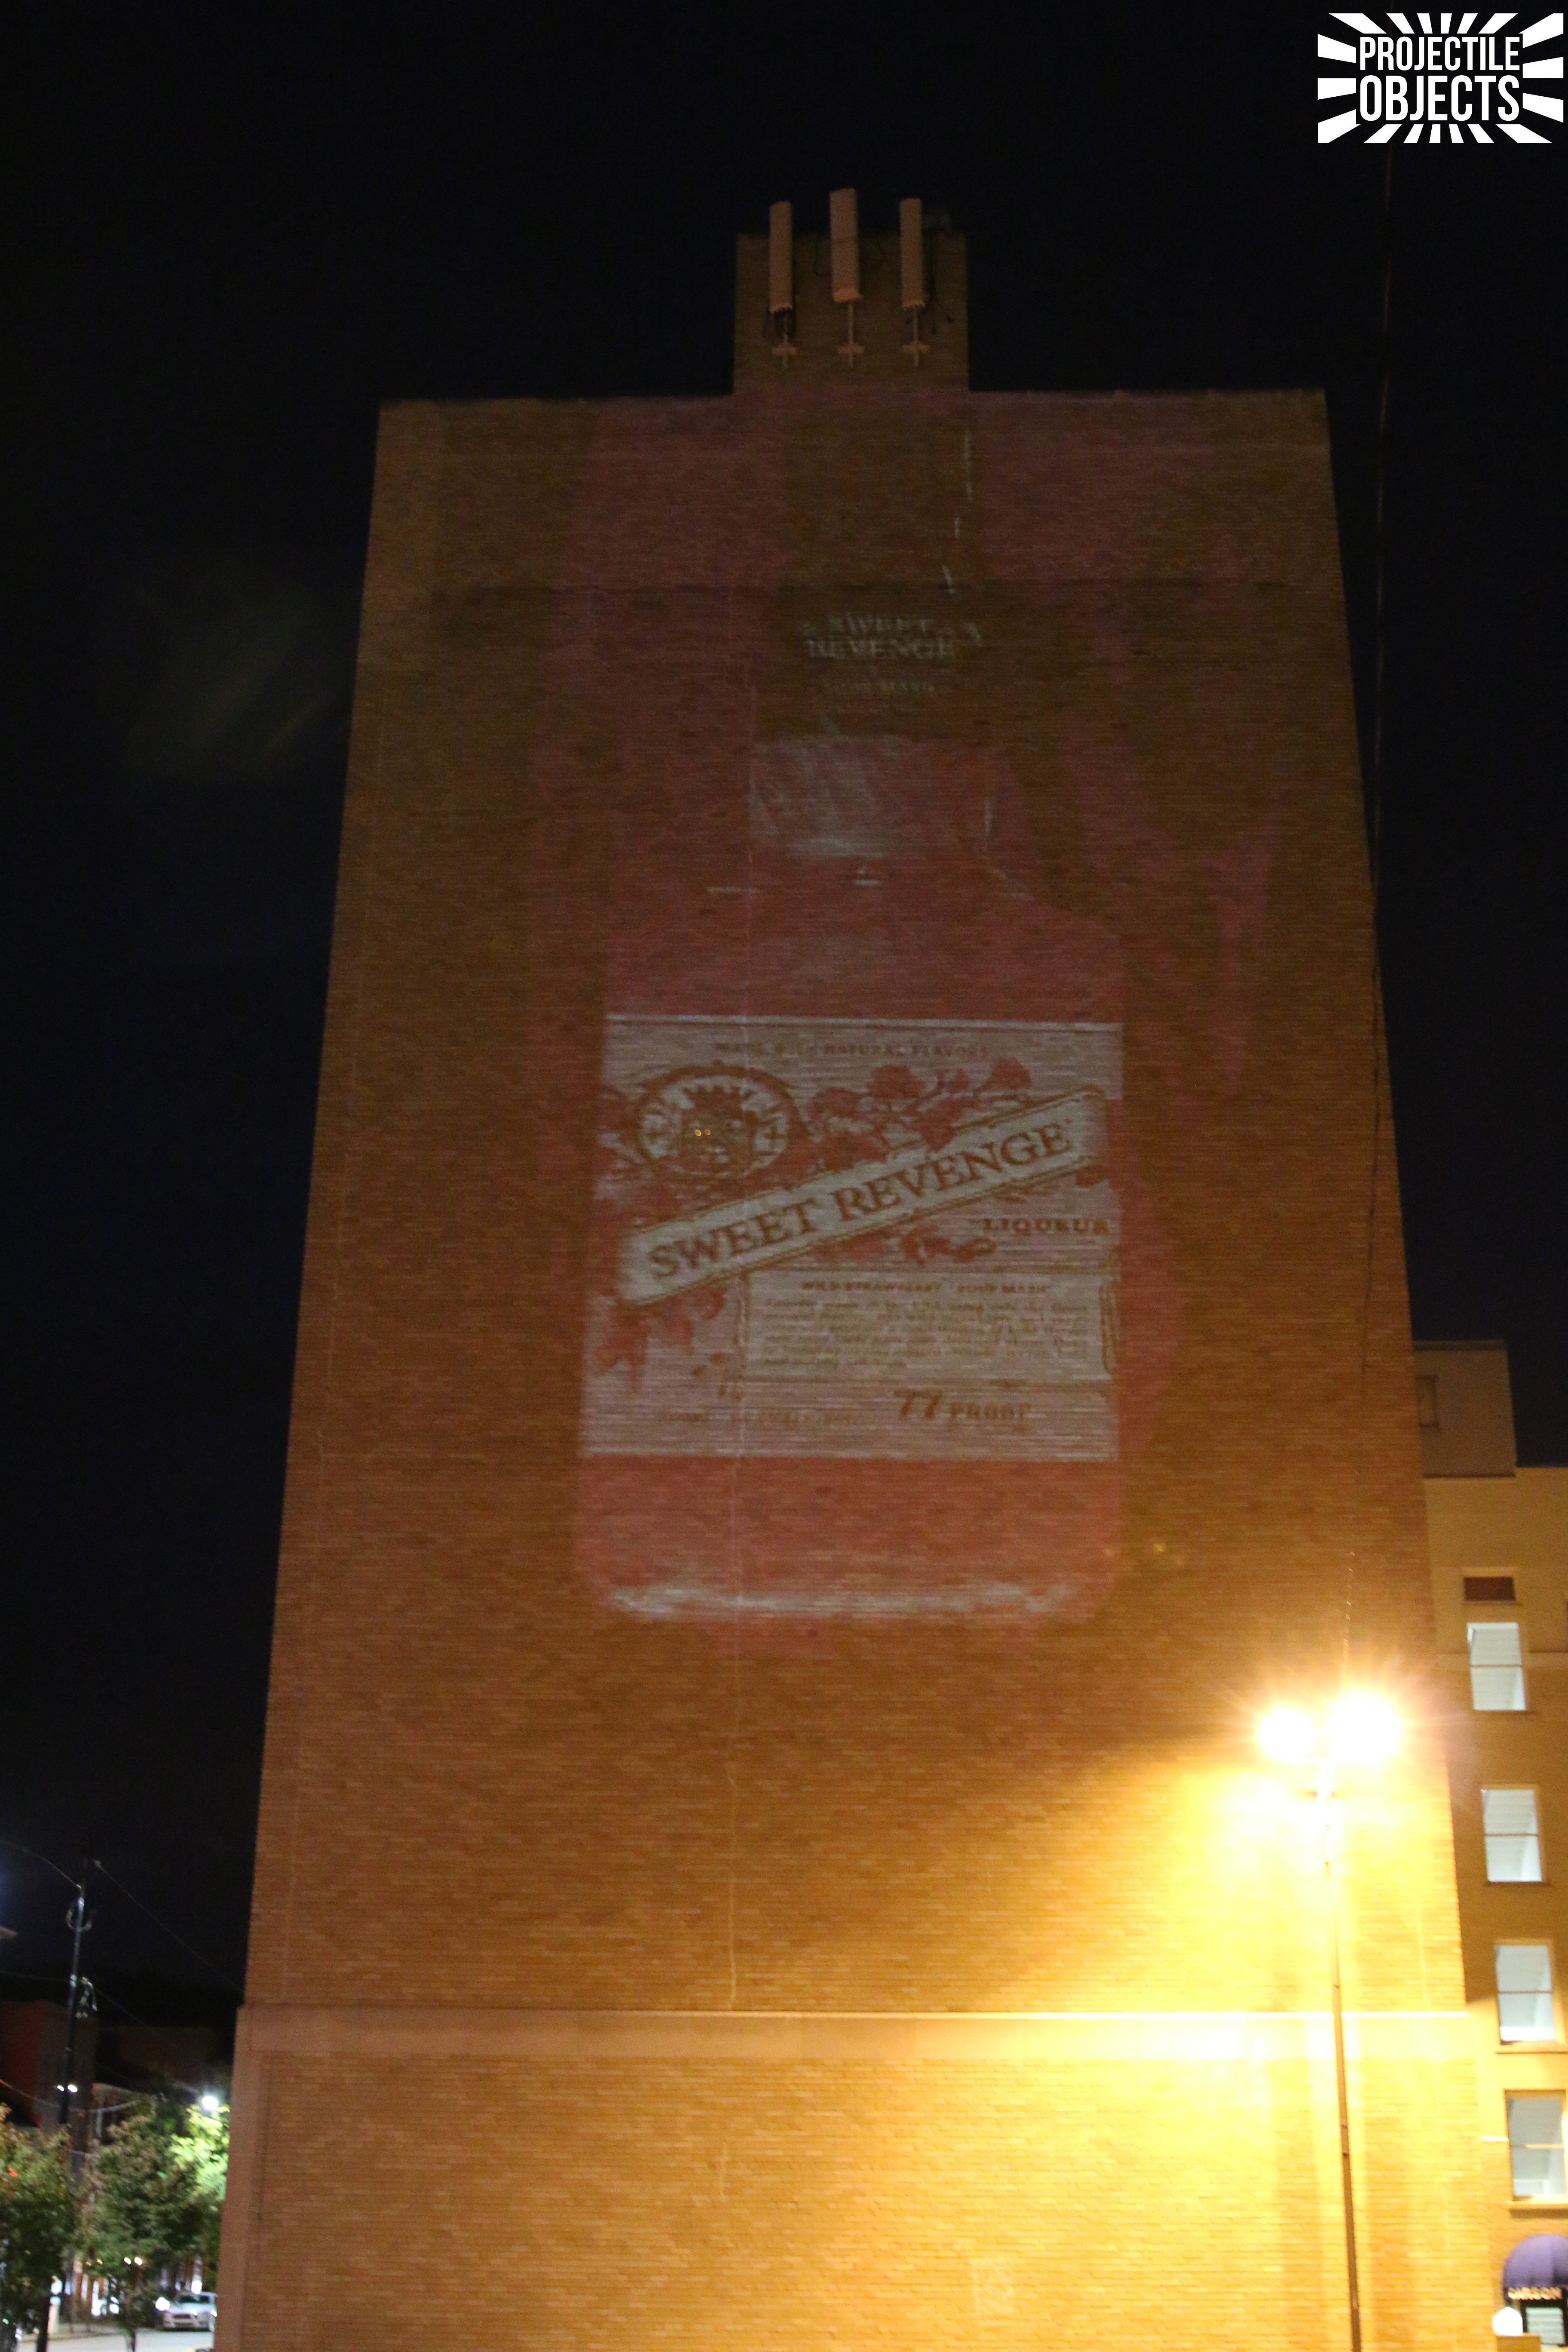
If you notice in the first images night scouting, and test projections there is a light pole in front of the building, but it never seems to be on. Until that night. Not to mention the wide angle .8 lens distortion of the mapped image when covering the full wall, which was expected. The initial plan was to project and render out a new version of the video with adjustments made on site to compensate for the variable setup, but the excess light pollution posed a serious problem for the now seemingly whimpy 8.5k projector.
Only three solutions remain, pick up some rocks and smash the lights, put a bag over the light (need a big ladder) or disable them. (Thanks to Dave at Hearcorp for this idea). At the base of the pole was a photosensor responsible for keeping that lamp off during the day and powering it on at night. I used the led light on my cell phone to test this idea. By holding the light over the photo sensor within minutes the flood lights shut off. It was now a simple trick of taping a constant light source to the photosensor to keep it off for the rest of our night. -=(Insert advertisement for camping headlamp)=-
[gss ids=”1597,1596,1595,1594,1593,1592″ name=”thefix” style=”width:100%” carousel=”fx=carousel”]
With the light out we still had a problem. The image wasn’t as powerful as we knew we wanted it to be and the wide angle lens was the culprit. By switching to the zoom lens and rotating the projector onto its side we concentrated the beam and produced a much bolder picture. But something was still missing, the visuals now seemed frameless and odd. Instead of being mapped to the full scale of the building the design was now trimmed and centered.
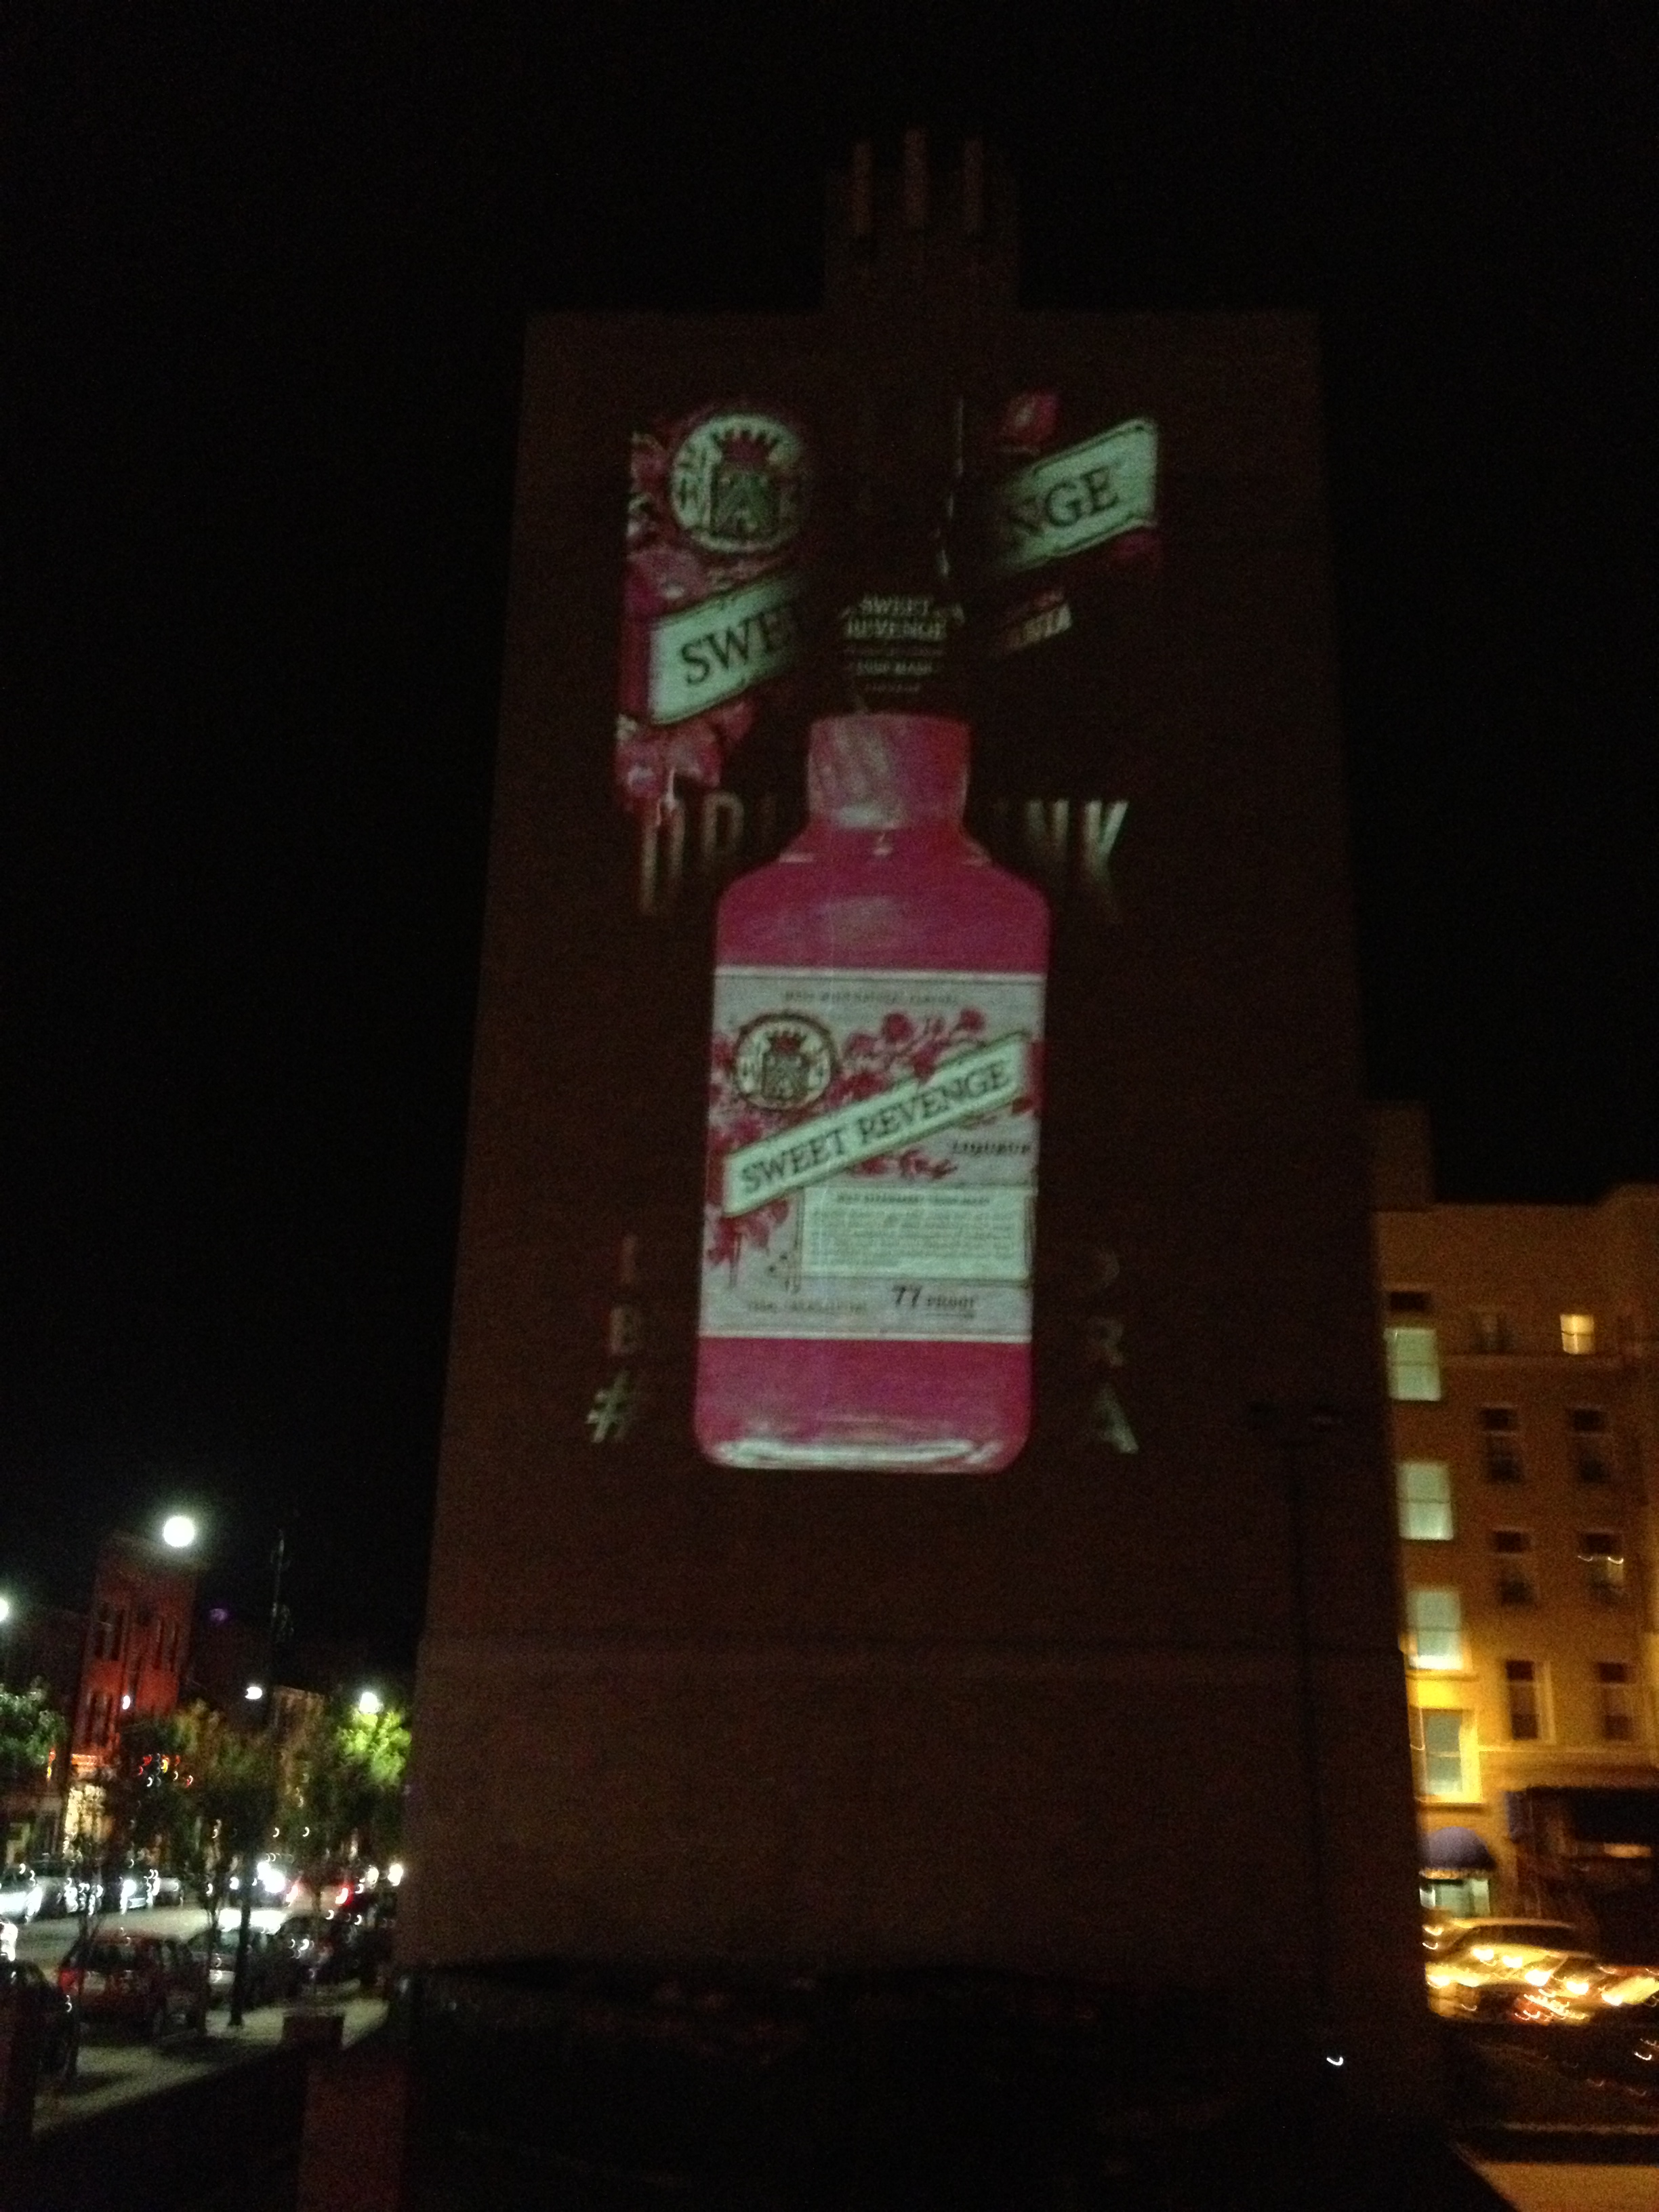
Adam had an idea and I rendered out a new set of visuals with a white border. Ta-da, New visuals are ready to be looped for the next 5 hours.

[gss ids=”1607,1606,1605,1604,1603,1602,1601,1600,1599,1598″ name=”theresult” style=”width:100%” carousel=”fx=carousel”]
Video shot once we were all setup.
[/spb_text_block] [spb_video link=”http://www.youtube.com/watch?v=i_kbggC_aqQ” full_width=”no” width=”1/1″ el_position=”first last”] [spb_text_block pb_margin_bottom=”no” pb_border_bottom=”no” width=”1/1″ el_position=”first last”]
In the end, the unexpected was much easier to deal with than expected. I hope that you can learn from this experience as much as I did. Special thanks to Leigh from Nakturnal: http://www.nakturnal.net/ Dave, Adam & Issac from HearCorp: http://hearcorp.com/ And Sweet Revenge for making a pink drink bold enough to cover a wall: http://www.sweet-revenge.com/
[/spb_text_block]